Set up Mimir, step by step
About ten minutes, from download to your first answer.
Every picture below is a real screen from Mimir. Follow along in order; each step says where to find it again later.
1Install Mimir
Get the installer for your computer from the download section: Windows 10 or 11, or a Mac (Apple silicon or Intel).
- Windows: run the installer. Because Mimir is new, Windows may say it protected your PC. Choose More info, then Run anyway.
- Mac: open the .dmg and drag Mimir into Applications. It is signed and notarized by Apple.
From then on Mimir tells you when a new version is out, with a gold pill in the status bar, and installs it with one click.
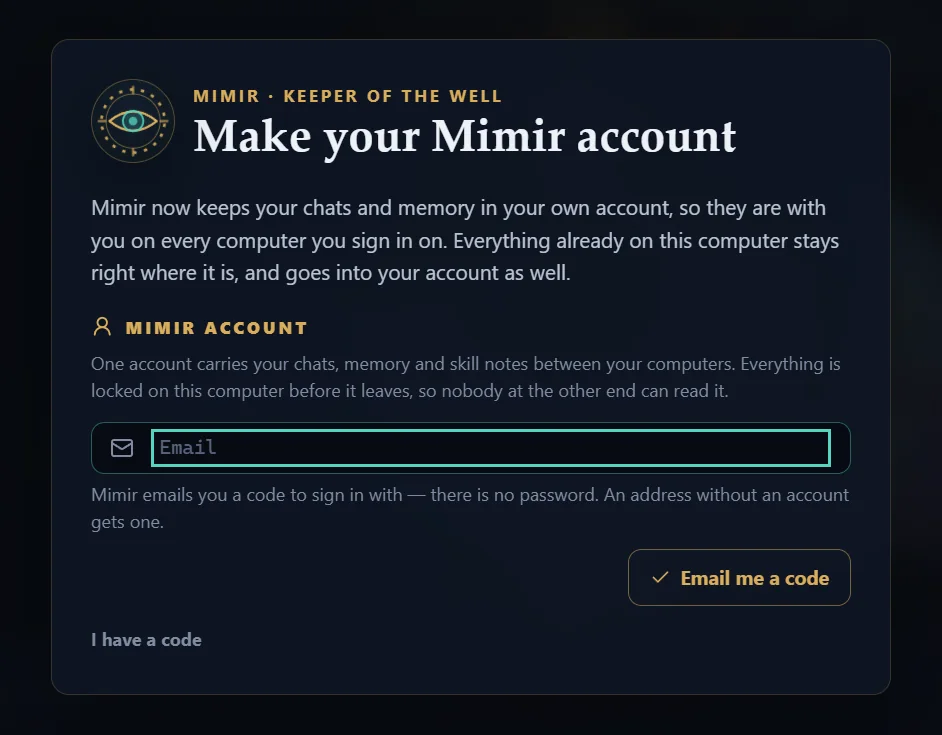
2Make your Mimir account
The first time Mimir opens, it asks for your email and sends you an eight-digit code. There is no password. Type the code, and you are in.
Your first account on a computer comes with 1,000 free credits (a dollar of DeepSeek V4), so you can start talking without finding a key. Write down the recovery key Mimir shows you once; it is how you get back in if none of your computers is at hand.
3Choose who answers
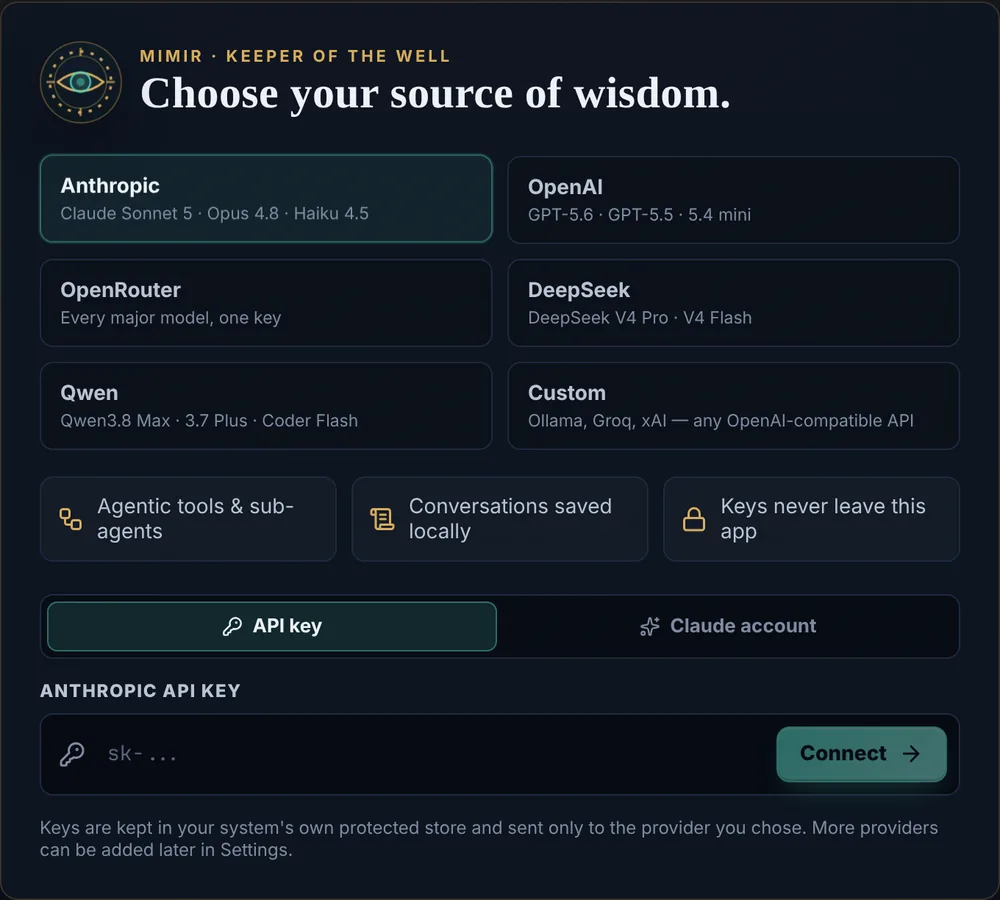
Next, Mimir asks which AI to use. Pick one card:
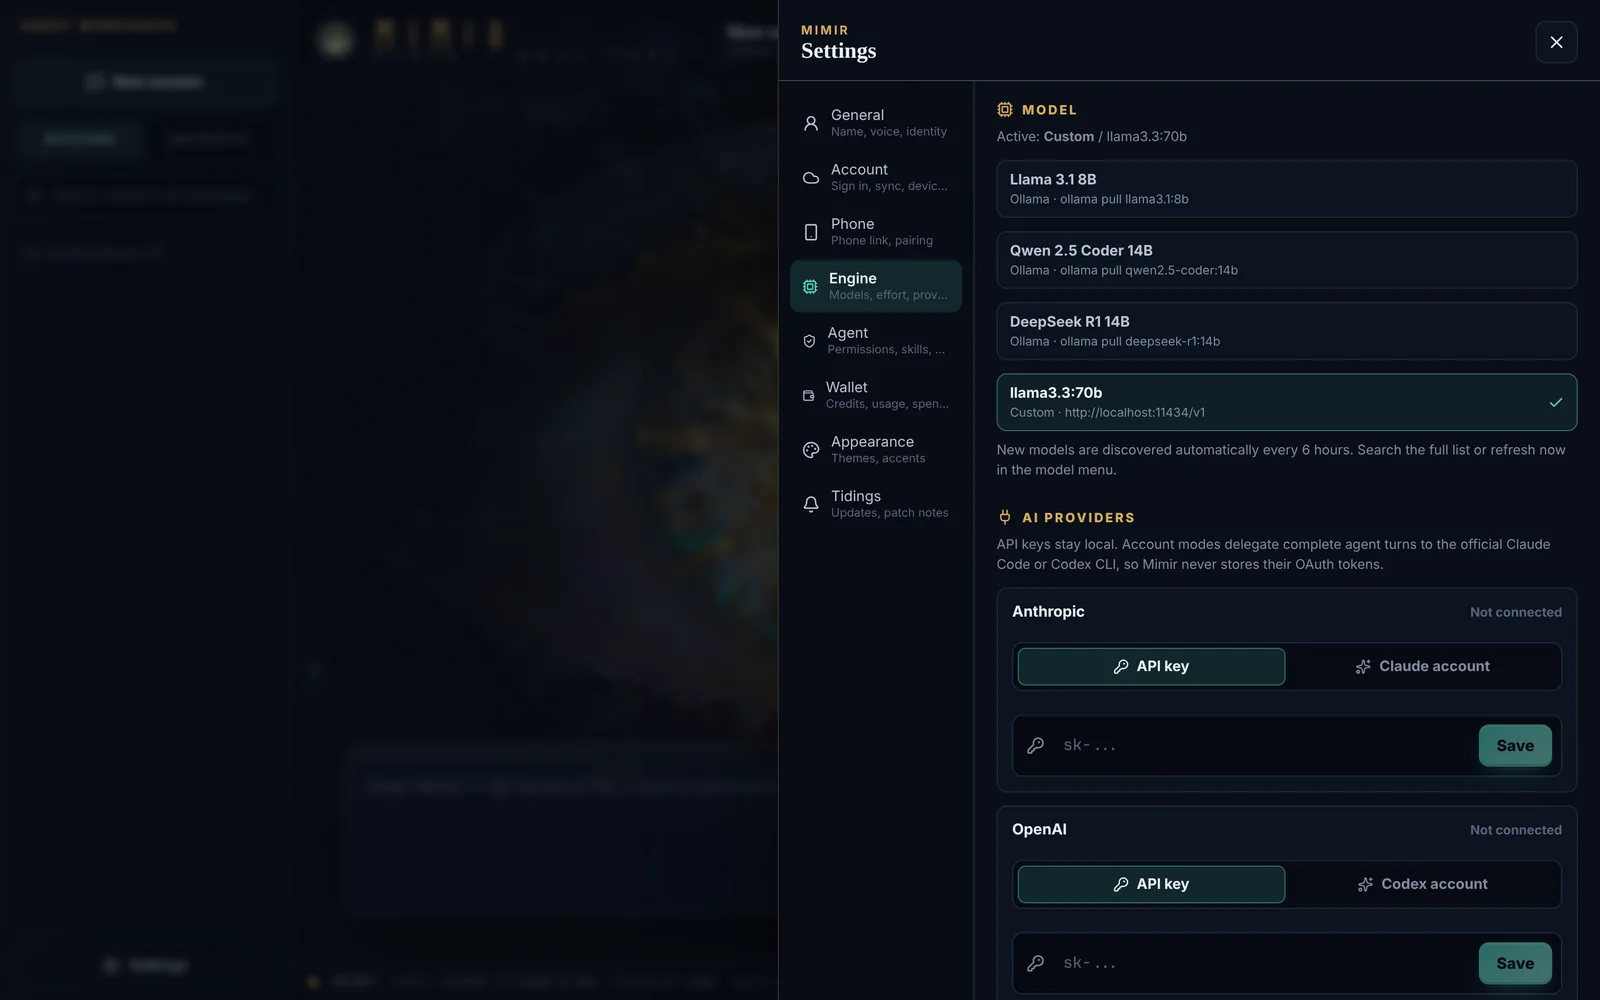
- Mimir credits: nothing to set up. Mimir runs DeepSeek V4 for you on your account's credits. Settings → Wallet shows what is left.
- Your own API key from Anthropic, OpenAI, OpenRouter, DeepSeek or Qwen: paste it and press Connect. It is sealed by Windows or the macOS Keychain and sent only to that provider.
- A Claude or ChatGPT plan you already pay for: choose Anthropic or OpenAI, then the account switch, and sign in in your browser.
- Custom: Ollama, or any server that speaks the OpenAI format.
4Tell Mimir about you
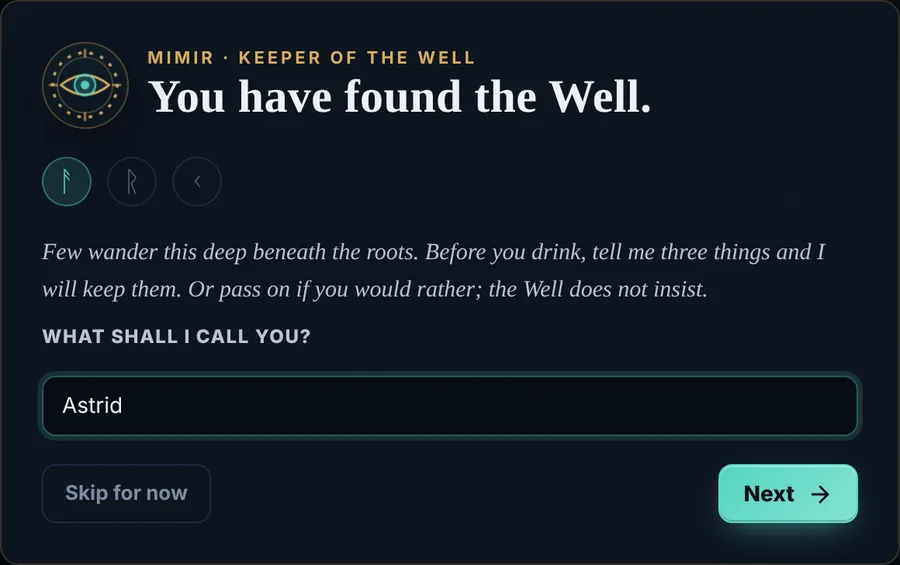
Mimir asks three things: what to call you, what you mainly use it for, and how it should speak to you. Each can be skipped. It keeps the answers so it knows you from the first chat.
5Take the tour
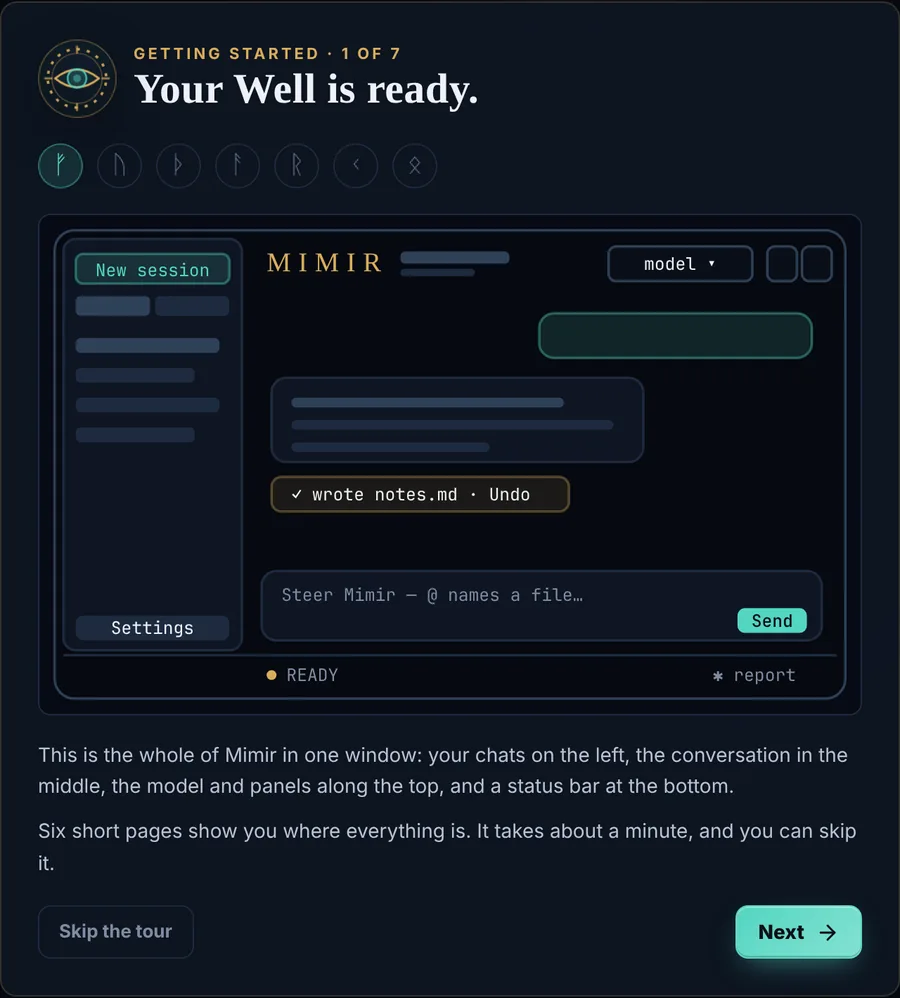
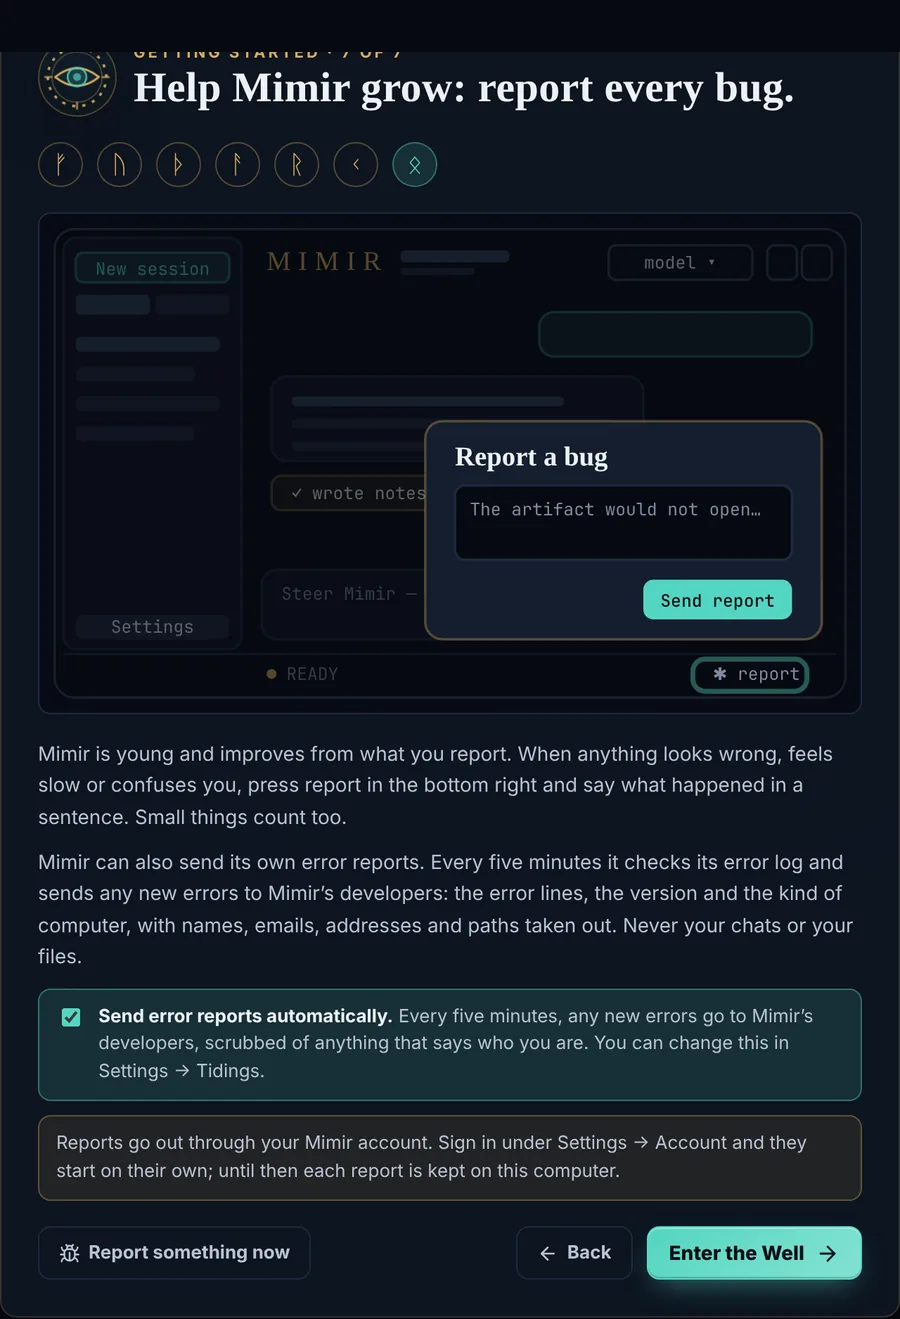
Then a short guide walks through the window, one part at a time, with that part lit up: the message box, the model picker, your workspace, the approval card, your phone, and reporting bugs. It takes about a minute. Settings → Tidings → Open the setup guide shows it again whenever you like.
6Your first chat
Type what you want in the box at the bottom and press Enter. Mimir can read and write files in your workspace, run commands and search, and it shows each step as it works. A few things worth knowing:
- Type @ to name a file and / for a command. The paperclip attaches files and pictures; the microphone lets you speak.
- New session at the top left starts another chat. Several chats can answer at once.
- Everything happens in one folder, your workspace. Files Mimir makes appear under Artifacts, and every turn that changed files has an Undo under its answer.

The picker at the top right changes the model for the chat you are in. Providers you have not connected say Connect.
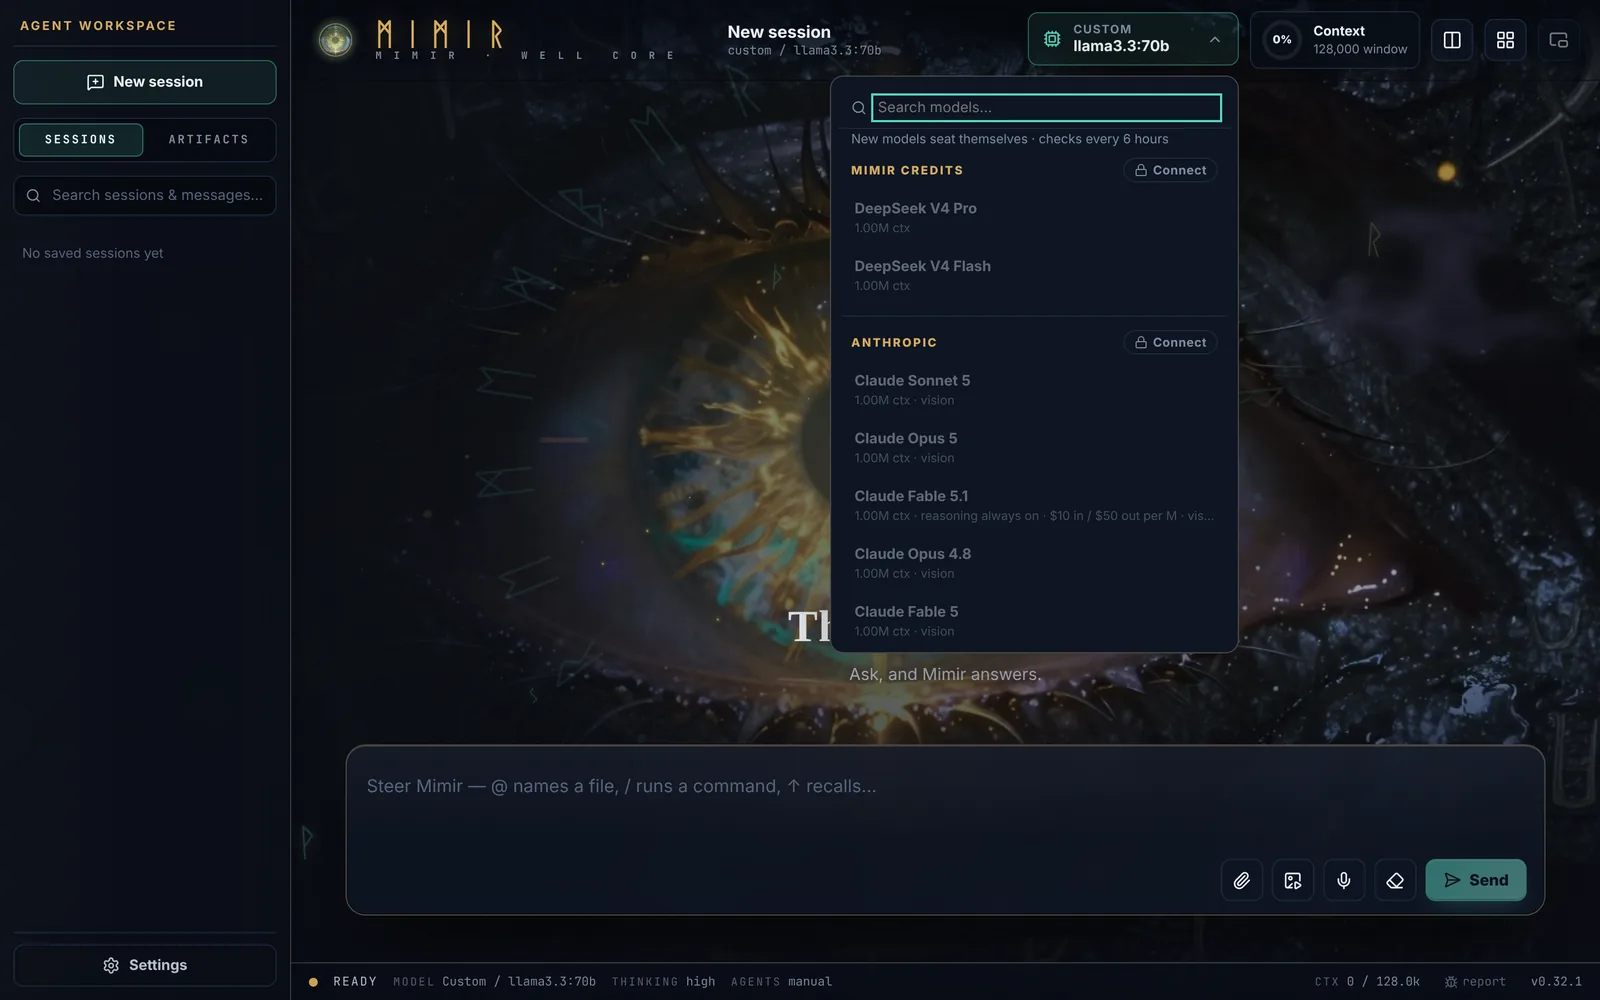
Settings, at the bottom of the sidebar, is where everything else lives: Engine for providers and keys, Agent for permissions, Phone for pairing, Wallet for credits and spend, Appearance for themes.
7Say yes, or no
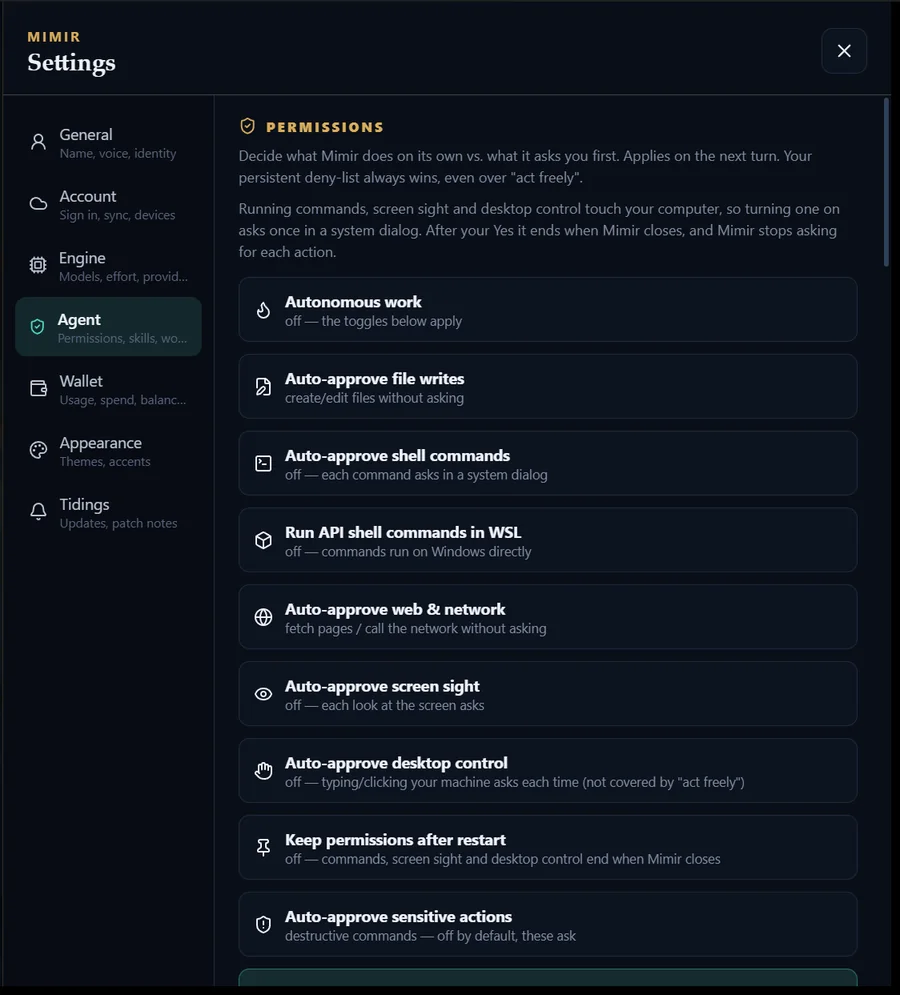
Reading is always allowed. Before Mimir writes a file or runs a command, it asks, and nothing happens until you say Allow. Running commands, looking at your screen and moving your mouse also stop at your operating system's own dialog, where No is the default.
When you trust it with a kind of action, turn that switch on in Settings → Agent and Mimir stops asking for it. Commands that delete or overwrite still ask on their own.
8Pair your phone
With the Mimir app on your phone you can talk to your agents and your desktop chats while you are away. Your computer does the work; the phone is the window.
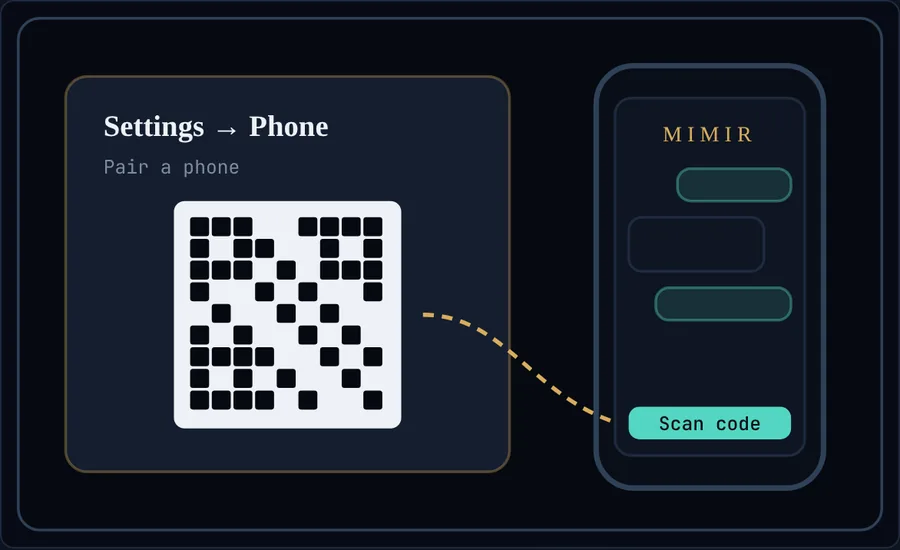
- On your computer, open Settings → Phone and press Pair a phone. A code and a QR code appear for a few minutes.
- In the Mimir app, choose to pair and scan the QR code, or type the code.
- Keep Mimir running on the computer. If the phone says the link is down, Mimir on the computer is closed: open it, and the phone finds it again.
9Report every bug
Mimir is young, and it grows from what you tell us. If anything looks wrong, feels slow, confuses you or just seems off, please report it. A one-line report is plenty, and small things count too. Every report is read.
- Press report at the bottom right of the window.
- Say in a sentence what you did and what happened.
- Press Send report. Mimir's version, the model, what it was doing and its error log go along by themselves.
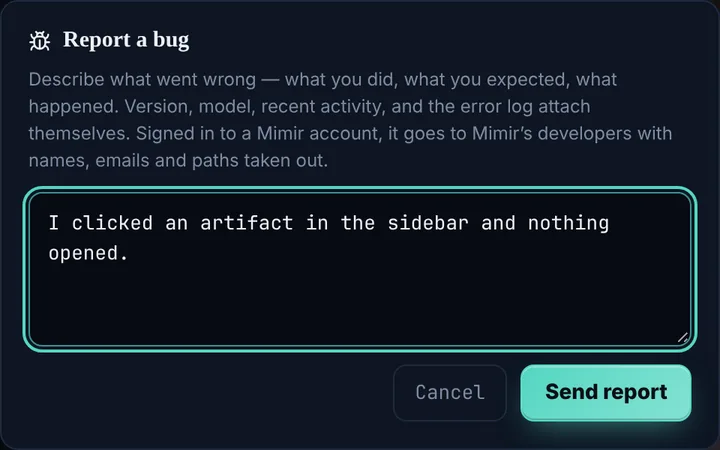
Mimir can also report its own errors. Leave Send error reports automatically on (the setup guide asks, and Settings → Tidings has the switch), and every five minutes Mimir checks its error log and sends any new error to us. Reports go through your Mimir account with names, emails, IP addresses and the paths of your folders taken out, and they never carry your chats or your files. The privacy page says exactly what is sent.
Not signed in, or no Mimir on hand? Open an issue on GitHub and say what you did and what you saw. A screenshot helps.
That's it
You are set up. Ask Mimir anything; it is glad of the work.